The Revolution is here and it's called Statamic 3
Statamic is a Content Management System (CMS) built from Laravel developer's dreams. It's like a bird, a plane, a promise of a better future, a Wordpress without React. It's markdown and PHP.

I've finally realized and come to appreciate the power of a CMS system. After maintaining my own blog built on Laravel Nova. After publishing on Medium. After hosting a static site from various free and open source software that got abandoned by their maintainer or never really had much of a community in the first place. Publishing content is paramount to any web operation. The internet is media and how you manage your media can determine a lot of the success of your business. If you need a developer to commit to the codebase or write entries to the database to publish a blog post or update copy there's a lot of overhead there. Pre-release when I found out that you'd be able to install Statamic 3 into a new or existing Laravel application I was intrigued.
The Statamic team is grounded in the Laravel community. Their copy is hilarious. Their leader Jack McDade is a far out designer. His Radical Design course is expected to be out soonish and his personal website reads I'm Jack McDade and I'm tired of boring websites. Statamic has been around since 2012. In addition to Jack it was cofounded by repeat Product Hunt maker of the year Mubashar Iqbal (aka Mubs). Statamic 3 was launched with a magical unicorn on June 11th, 2020. You can read the announcement blog post titled Everything You Need to Know About Statamic 3.
Let's start with the end in mind shall we?
I'm typing this on a beautiful editor in my browser. There's no code changes I need to make to get this post out. I don't need to write it in a google doc and paste it over. The Statamic dashboard gives me powers. Hell, Mr. McDade even live streamed building an AirBnB clone with Statamic. It'll be the first video result when you google "Statamic Airbnb for chairs". Though I'm familiar with Laravel and love to code I don't want to start with anything too crazy because with great power comes great responsibility. P.S. they're casting Toby McGuire and Andrew Garfield in the new Spiderman movie with Doctor Strange. It's gunna be lit. In this tutorial we'll go over how I built and launched this very site you're on using Statamic 3. We're hosted on Netlify and bought the domain name with Google Domains.
How it all began
This project began on the internet. The internet is a series of interconnected tubes. Birds fly in some of these tubes and they come out on an internet website called twitter dot com.
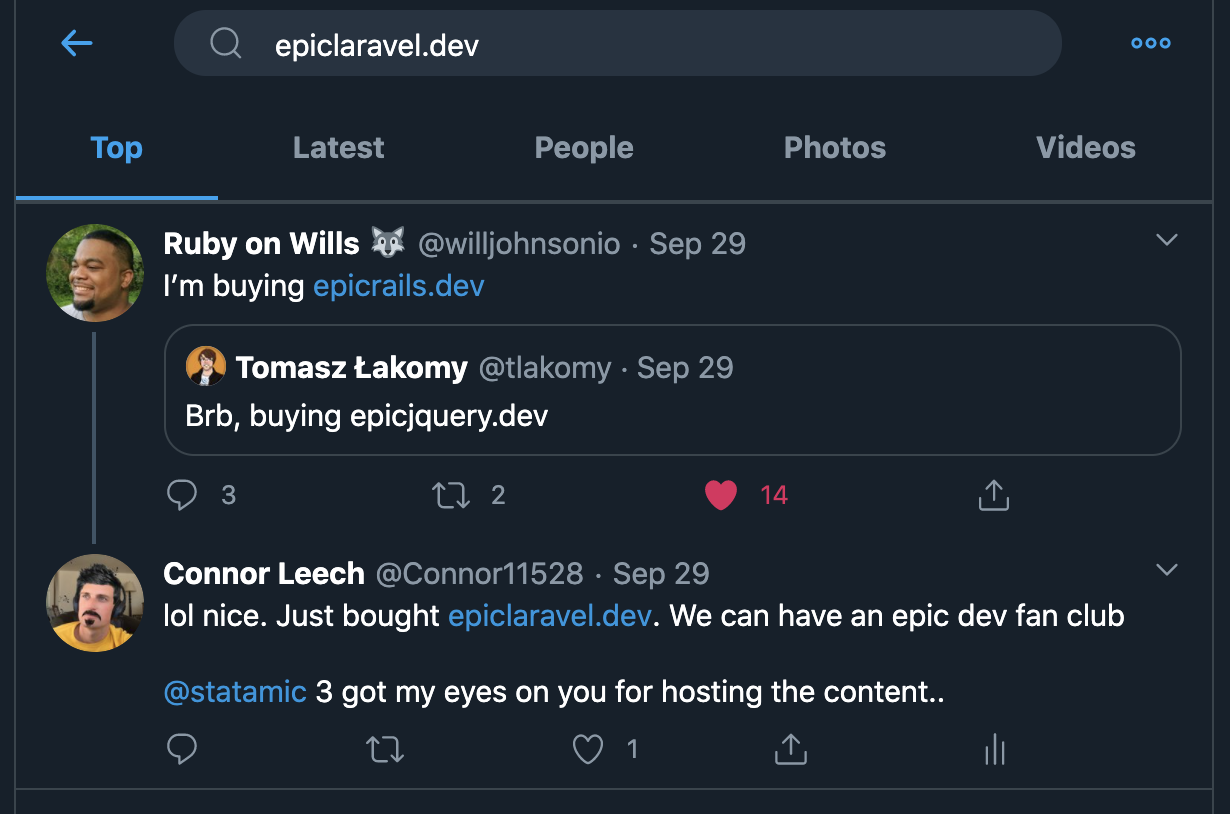
I'd followed William since purchasing his book on how to Break Into Tech With Twitter. To be perfectly frank I have not started the book but I'm looking forward to reading it. As another side project I run a site called Employbl that is a resource for job seekers. I figured the book would be good reading to learn about how people break in and get their start in the tech industry. Everyone's experience is different! I'd categorize myself as a Laravel fanboi. I use it in my day job. I build my side project with it. I like to learn about it. I follow Laravel devs on Twitter. There's lots I like about it. I've blogged a fair bit about Laravel but never really dedicated a site to it. I run a Full Stack Developer Meetup group. But even there we don't really have a blog. Until recently I published my Laravel tutorials and blog posts on Employbl. That's fine but it's not strictly related to the company mission. I'd like Employbl for the tech industry more broadly, even other departments outside of engineering. It's ultimately about giving you the tools to help you get hired. I needed a space for Laravel developers. Plus, Statamic 3 was out and I wanted to give it a test drive. I bought the domain epiclaravel.dev on Google Domains for $12 for one year of hosting.
Create a project
I had a domain then I needed to create a Statamic website. Here was the first "AHA moment". Statamic 3 has a Static Site Generator package, open source on GitHub. This enables us to host our statamic sites anywhere we could store a bunch of flat files. That could be S3, Netlify, GitHub Pages, Vercel (formerly Zeit). It doesn't require us spin a server like we would if we were hosting a PHP application on something like Digital Ocean, EC2, Laravel Forge, Ploi or Render. I was excited. It simplified the whole process, reduced cost and would be easier to maintain and set up a deployment process for.
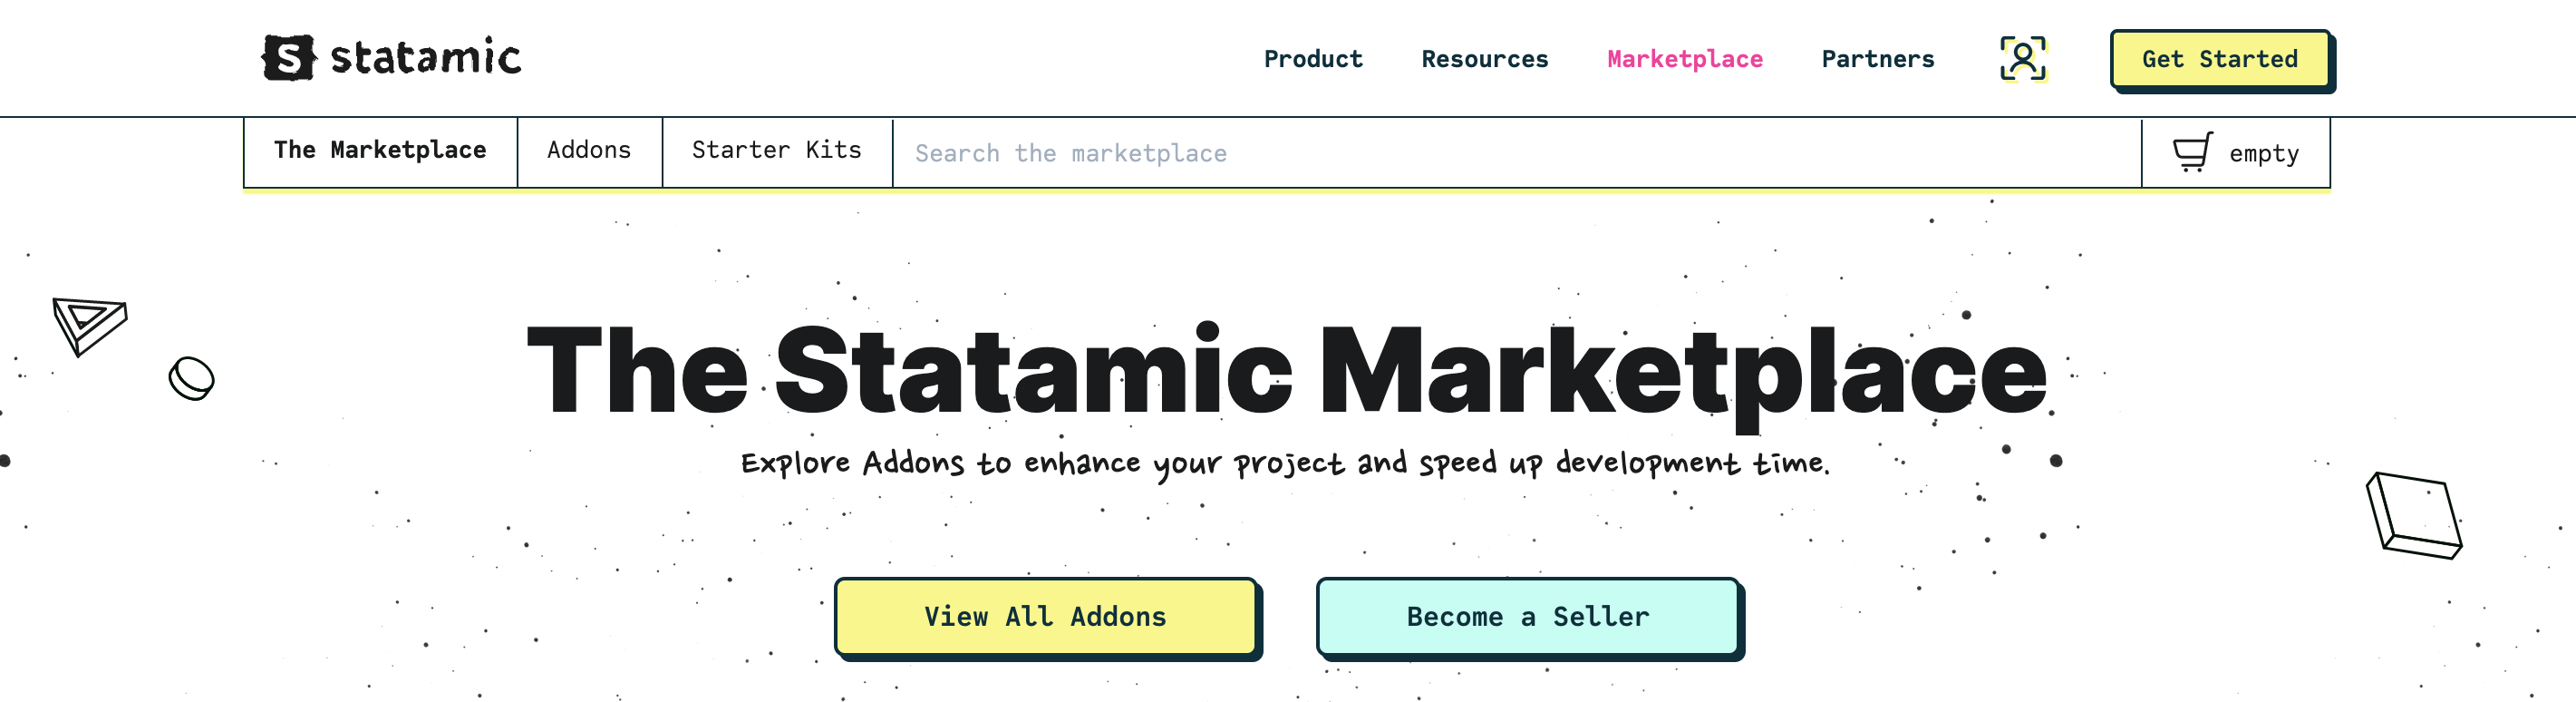
The Statamic team has built some starter templates for our ease of use. There are only a couple right now but I could see this being a growth area. They already have a Marketplace for Addons and display copy that a starter kit section is coming soon. Start building statamic starter kits now and you could be one of the first themes available on the platform!
Potential aside today we have a few options:
Going with the Doogie Browser theme was tempting but making my website look like a 90s PC was a bit too much to swallow so Starter's Creek it was. Once I'd picked a starter kit I could generate my project. Of course I could have started from complete scratch but I'm hella lazy like that and would like to be up and blogging / running building ChairBnB so I used a starter kit. The only difference being an argument when generating the project:
git clone git@github.com:statamic/starter-kit-starters-creek.git epiclaravel
cd epiclaravel
rm -rf .git
composer install
cp .env.example .env && php artisan key:generate
You can view the source code for the starter template here. The Statamic team has ingeniously named their main php worker file "please". To use the command line interface that's included with Laravel you use "artisan". To use the command line interface that's included with Statamic you use "please". So we create a user:
php please make:userFan Fact: Ecamm Live is a streaming tool for mac.
I have Laravel Valet set up on my local machine so will use that for running the website locally. The site is visible on my local though the browser at http://epiclaravel.test. Setting up Laravel Valet can be a little tricky if you're completely unfamiliar but it's worth it! For Laravel applications you can sites with Laravel Valet and use Takeout Docker containers to host other services your app needs like Postgres, Redis, Meilisearch, ElasticSearch and more. Laravel Takeout is built and maintained by the Tighten team. For my purposes having composer installed and Valet configured is enough to run the site in development.
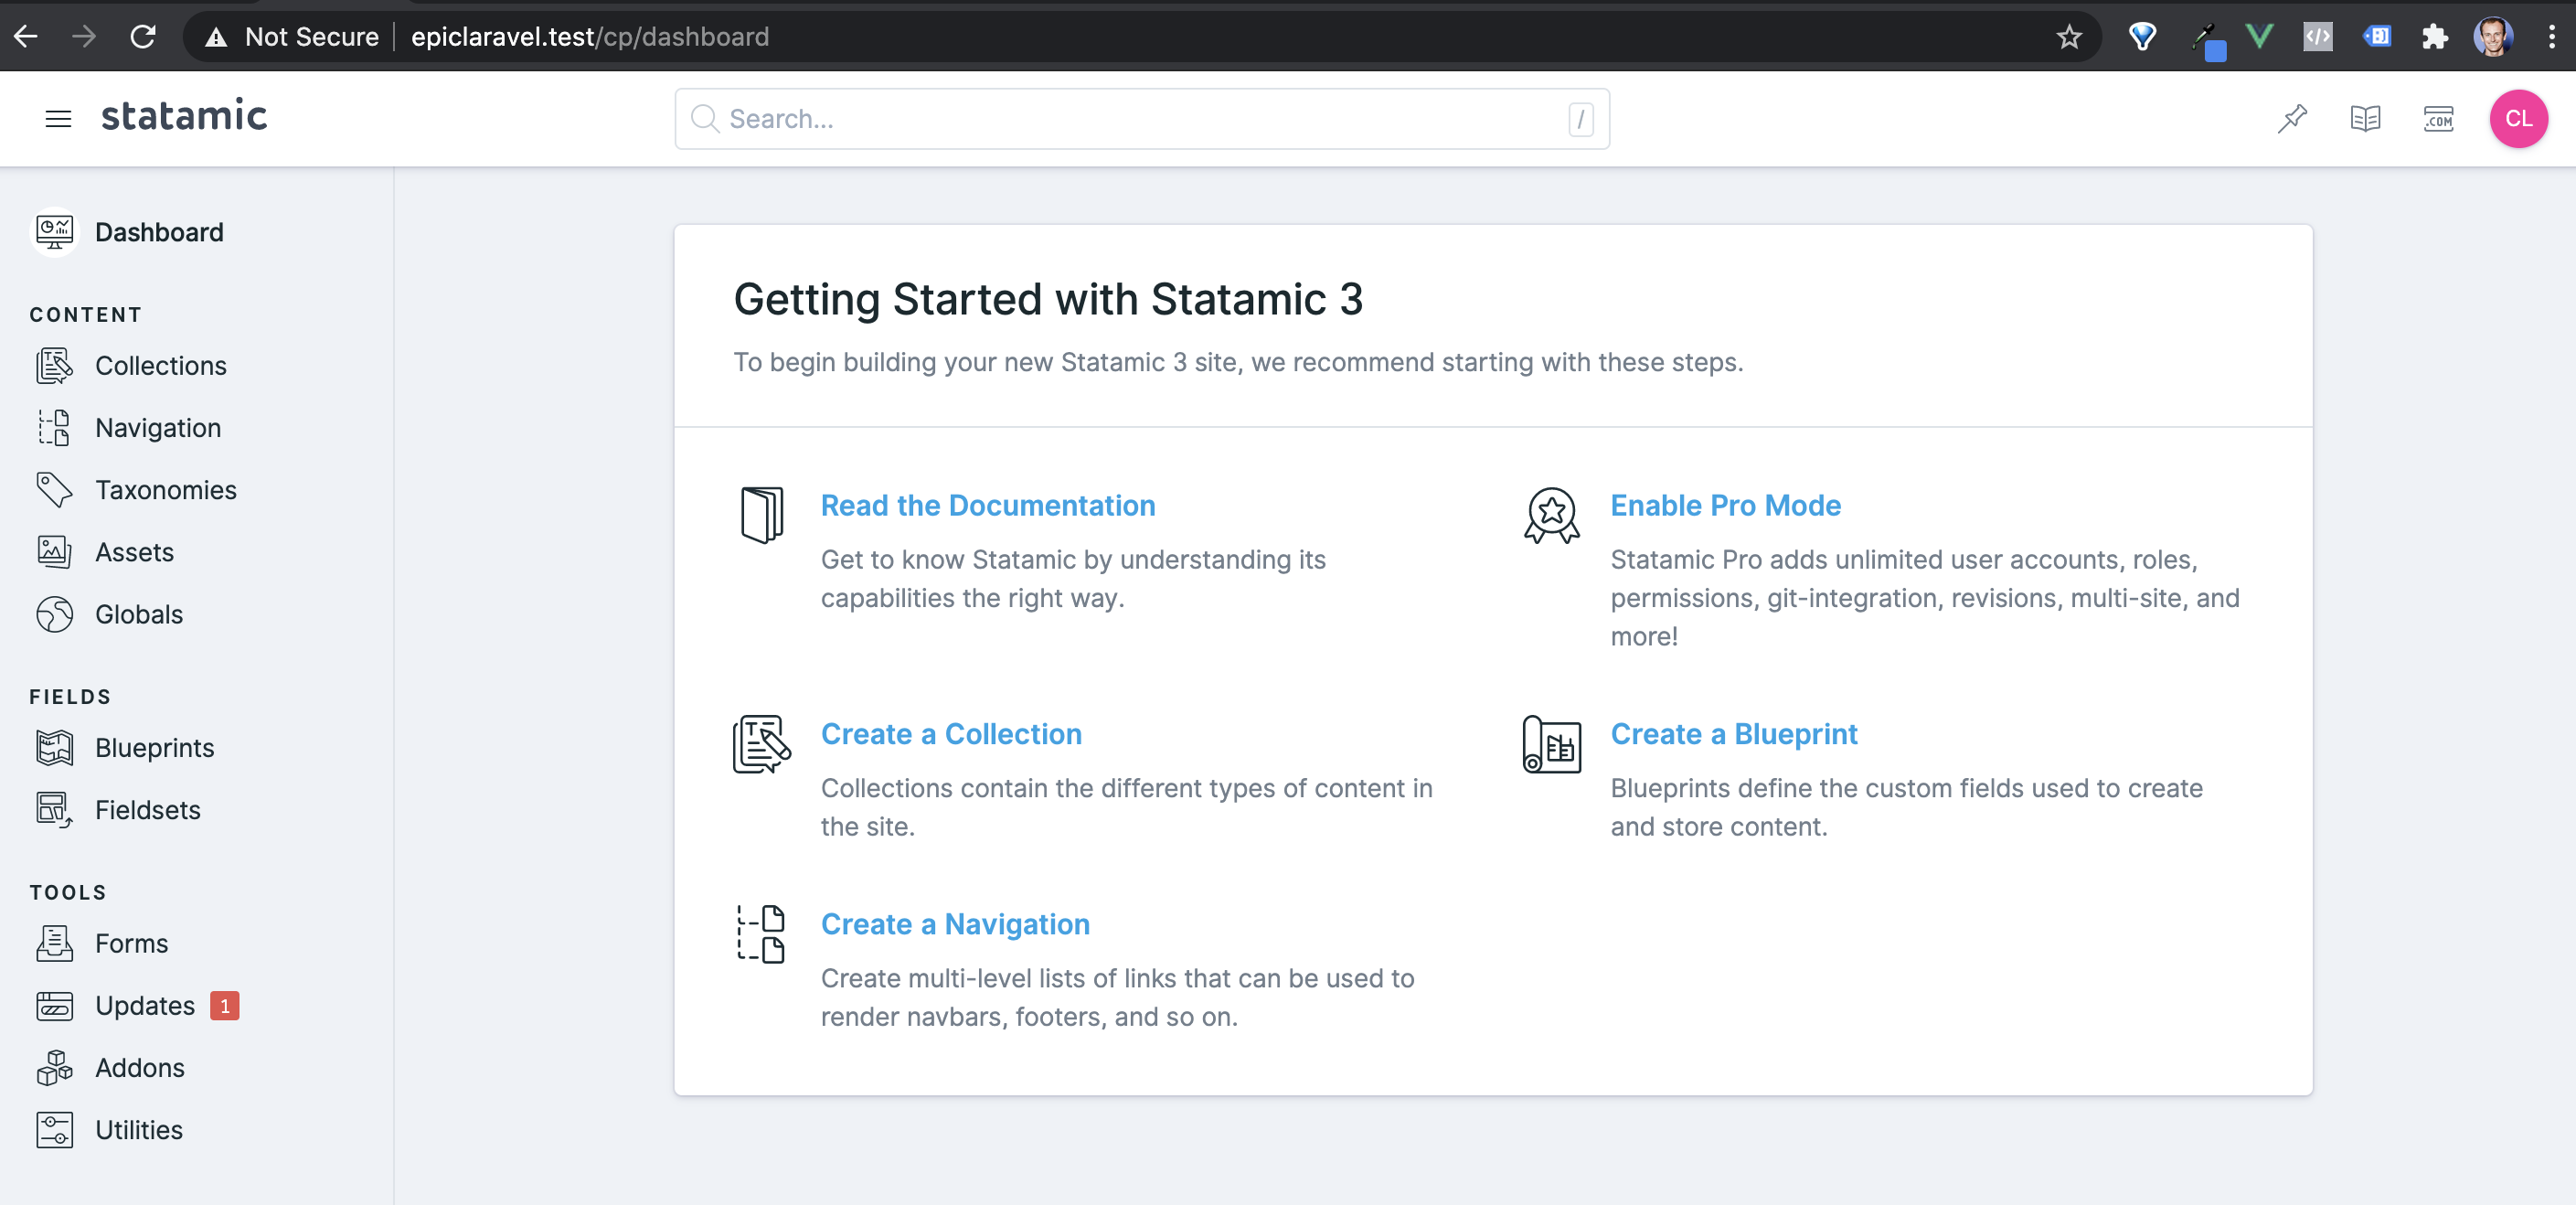
Enter the dashboard
To login to the dashboard head to your domain /cp. From there you're off and running. It's probably best to start reading the documentation. Statamic is really powerful and I'll probably write some more blog posts as I explore it more. Statamic Collections are very promising and I'm looking forward to implementing and learning about Statamic handles Search. Their documentation reads "There are three components — coincidentally the same number of Hanson brothers — whose powers combine to provide you the power of search. The form, the index, and the driver." With the site running locally and my user created I see this:
Open the project in a code editor (for example PHPStorm or VSCode) and you can play with the values or the HTML/CSS. The Starter's Creek starter kit is built with TailwindCSS. I'm excited to play with that. Previously I'd been plagued by build process errors when trying to set up Tailwind. I'd stuck to Bootstrap 4 out of habit. For now though we have the template, not a lot of feature development to be done. Let's deploy!
Deploy
One of the awesome new features of Statamic 3 (along with being able to install Statamic into any Laravel project as a composer package) is the Static Site Generator. Why is this awesome you ask? Static sites are easier to host than running your own server. When a site is “static” it pretty much just means it’s a bunch of files sitting on a server somewhere. All the computer needs to do is serve the files (HTML, CSS and Javascript) to the end users, in most cases a web browser. The alternative is having your own server that you maintain or doing “serverless” things (still involves servers). Static sites you can host with Netlify, Amazon S3, GitHub Pages or Vercel. If an app requires a server (and probably a database) you’re more in the Digital Ocean / Google Cloud / AWS / Azure space. Render and Heroku are great options too :)
We could deploy our Statamic site using a server and a database like a normal option. I think it’s going to be easier to deploy a static site to start off. All we want to do is host content for now. I’ve used Netlify before so going to stick with that.
We first need to require the static site generator composer package into our app:
composer require statamic/ssgWe’ll publish the config file to be explicit about what we have going on:
php artisan vendor:publish --provider="Statamic\StaticSite\ServiceProvider"This normally generates a file in the config directory. There’s a config/statamic directory. It looks like the starter template already had this ready to go. You can view the config file here if that’s what floats your boat 🚣
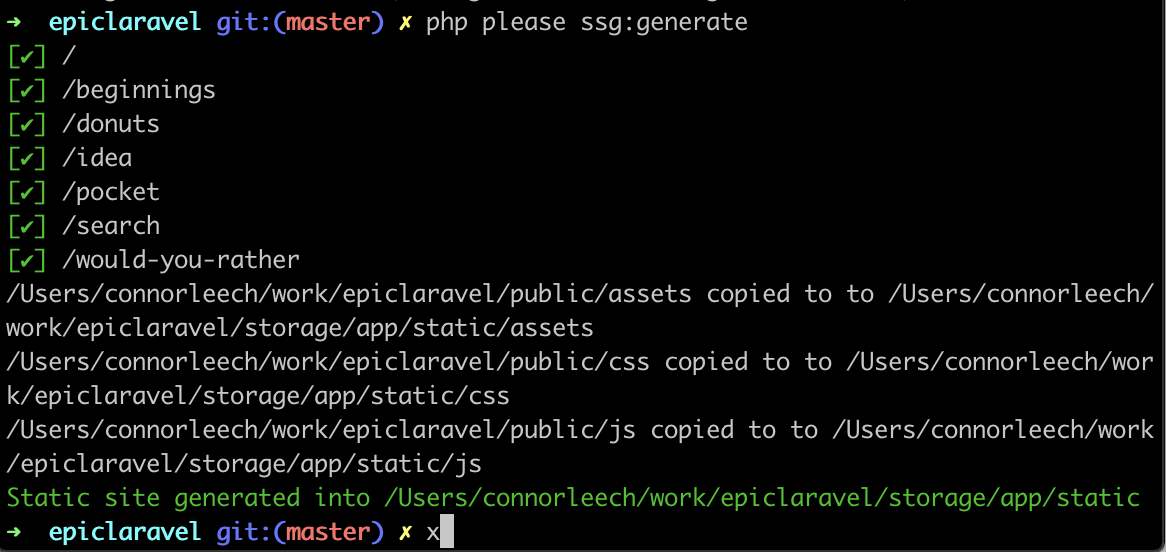
Now we can build our static site: ✨
php please ssg:generateThis is the output I got:
 The Statamic team outlined some Deployment Examples for us. It looks pretty straightforward and awesome:
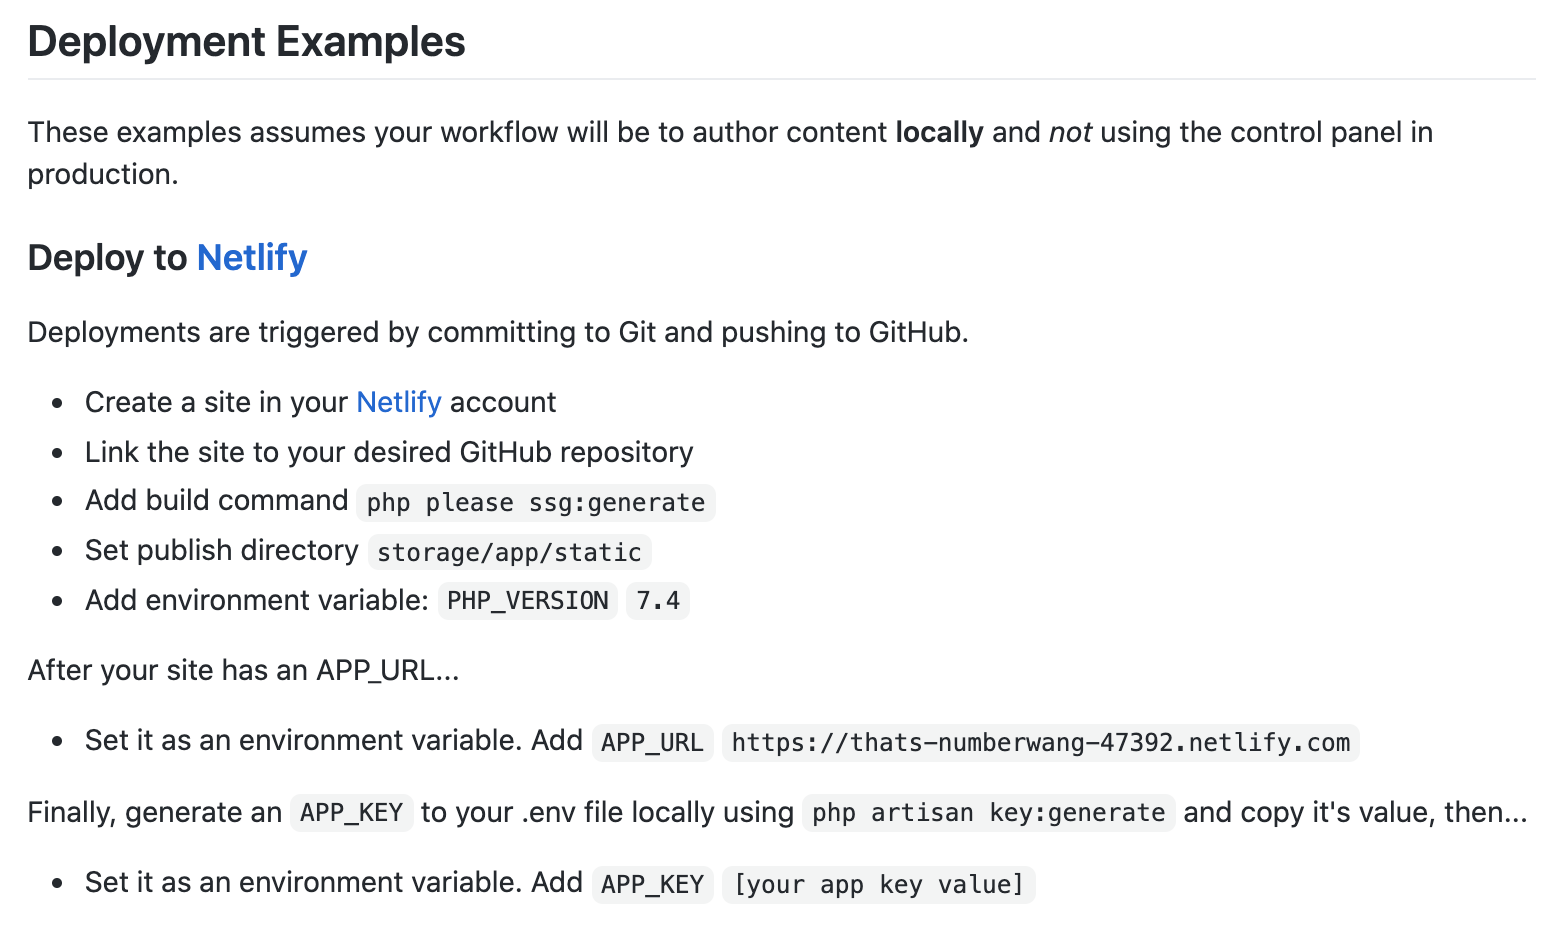
Here are the steps to deploy a static Statamic site. Your app will be powered by flat files and stored safely in version control
Deployment Step 1: Deploy to a GitHub repo
You could also deploy to GitLab or BitBucket. Honestly I’ve heard great things about GitLab but use GitHub mostly out of habit and for the platform’s social aspects. Maybe GitLab has that too idk. Anywho create your repo. From the root of your project run:
git init
git add -A
git commit -m 'initial commit'
Deployment Step 2: Deploy with Netlify
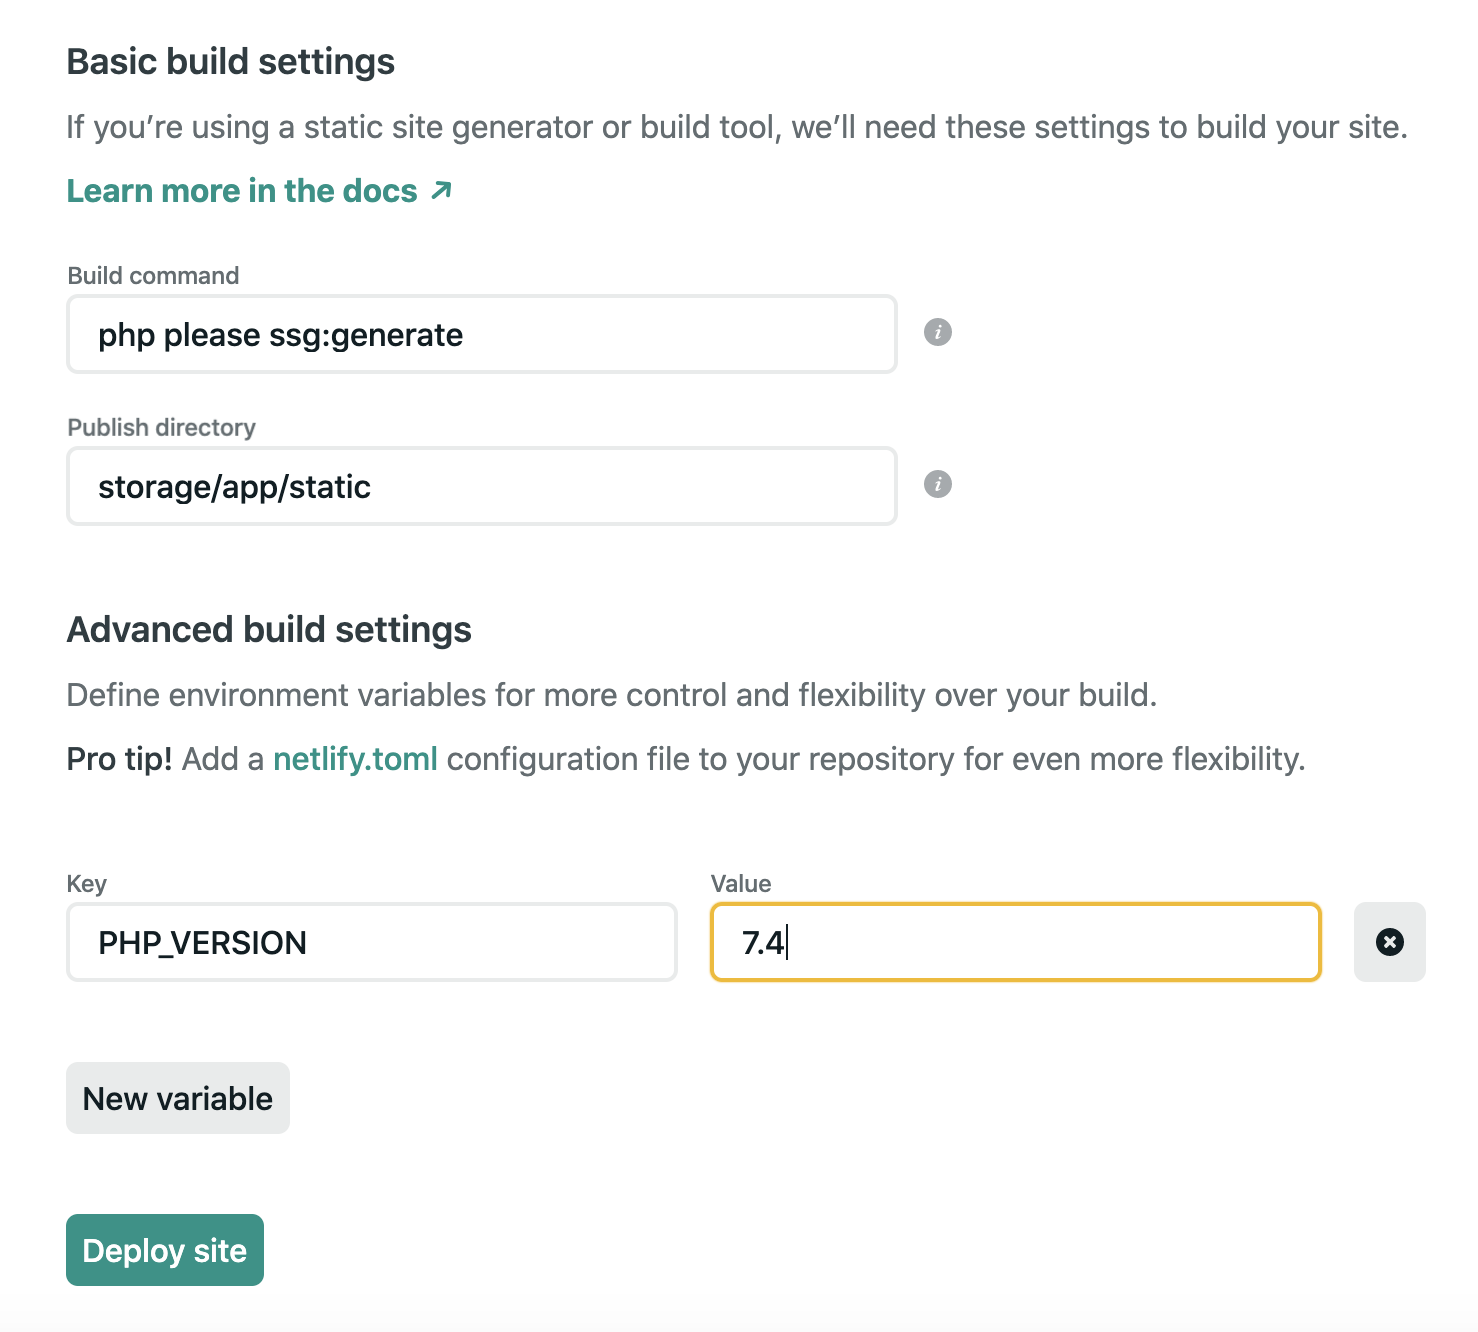
We can link Netlify to our git repo and configure the build command PHP version as an environment variable and set the publish directory:
This deploys our site to a Netlify URL like: https://boring-noyce-0f134b.netlify.app/
Woohoo! It’s live on the internet with continuous deployment set up. Pushing to the master branch with git will redeploy our site. We also need to set some environment variables on the Netlify dashboard. The .env file is not stored in git. The Netlify dashboard provides space to specify these variables for production.
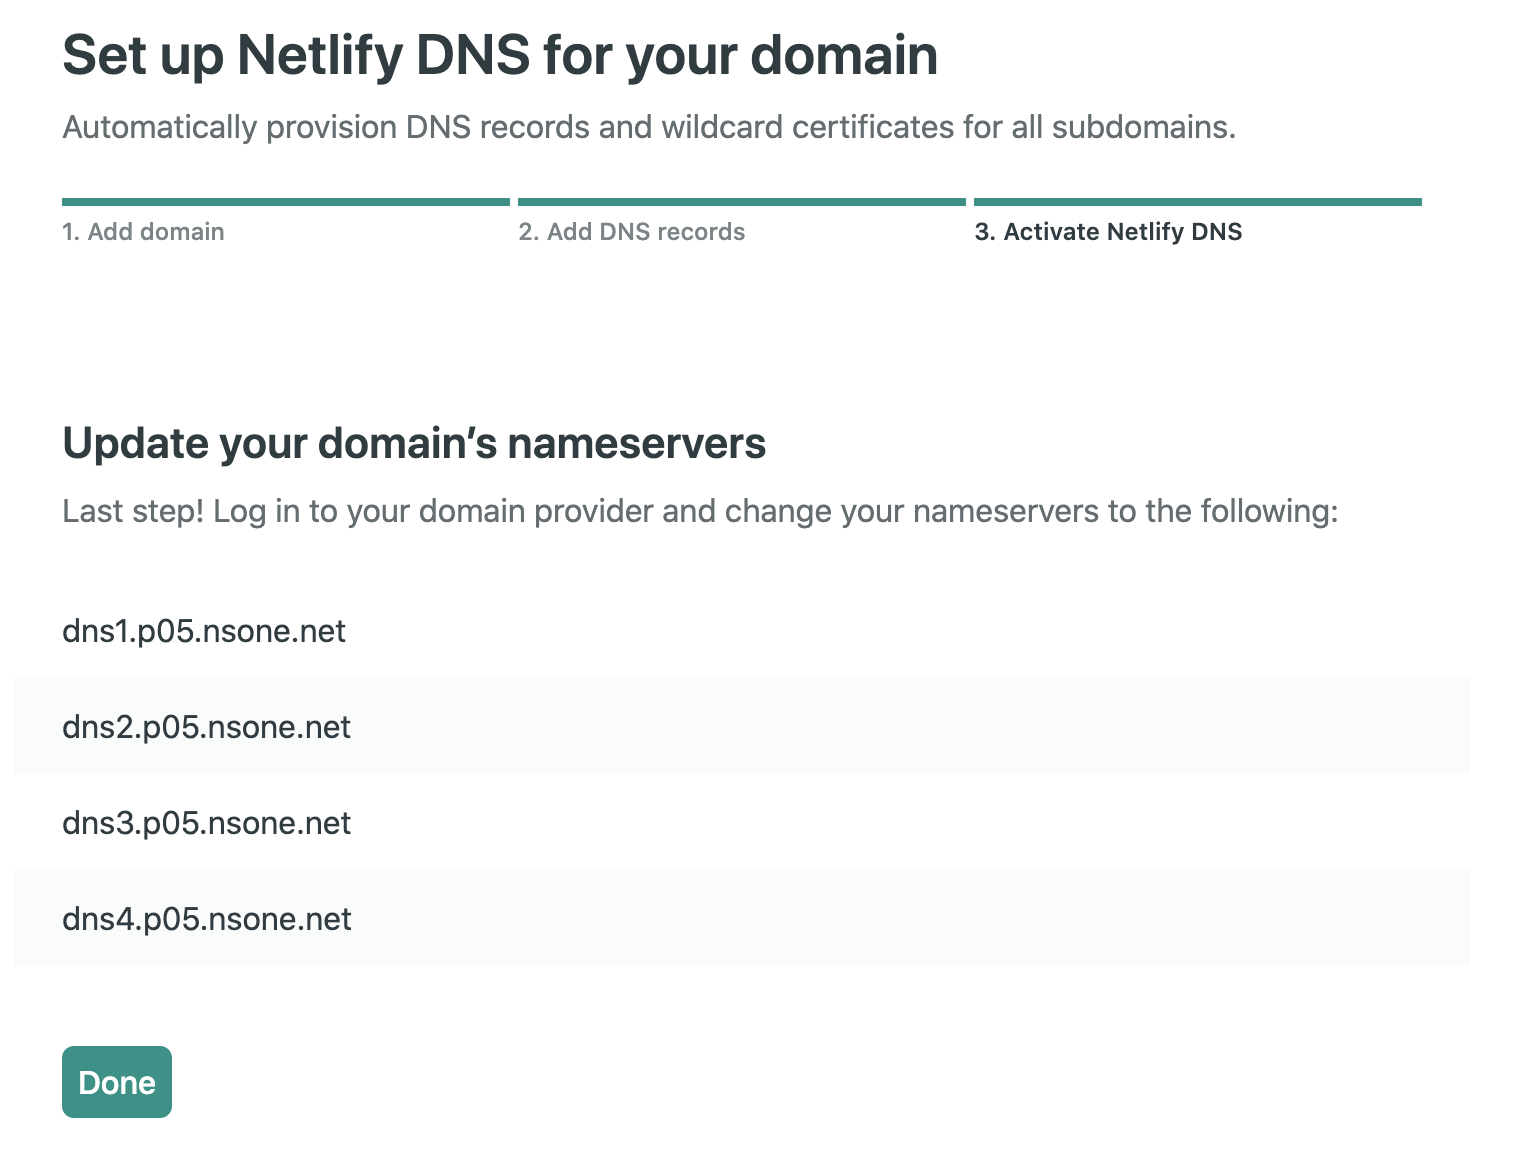
Deployment Step 3: Hook up domain name
I bought my domain name through Google Domains. This in hindsight was a mistake. The Google Domains UI is easy to navigate and I have other domains there but if I’m hosting through Netlify shoulda just bought the domain through them too. To point the domain name at Netlify’s servers. We’ll be using “Netlify DNS”.

This takes up to 48 hours to propagate over so let’s hope it worked! We can view the propagation status in the Netlify dashboard under Settings > Domain Management.
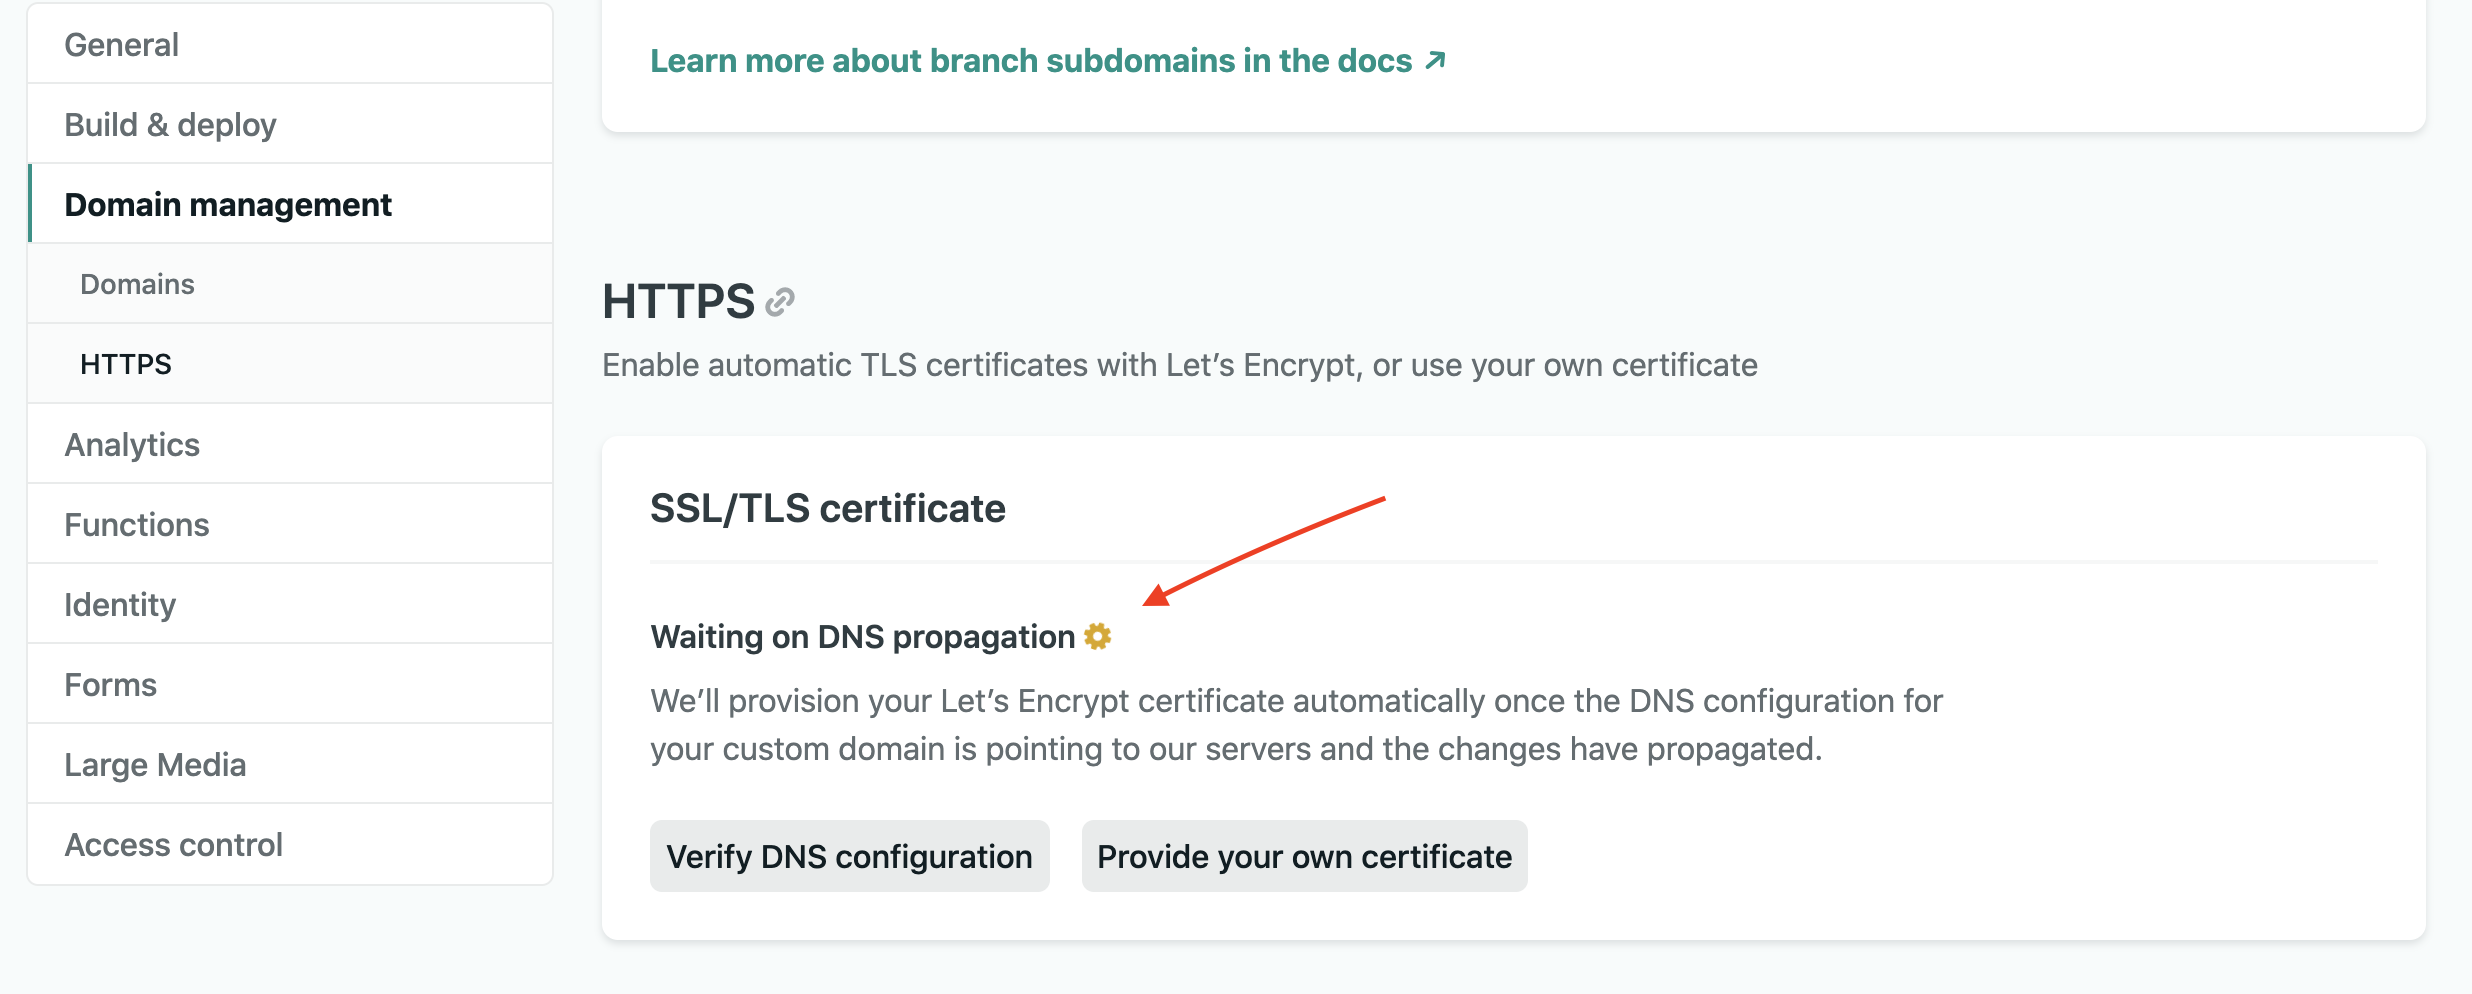 After the DNS changes propagate your site will be live. The flow for future updates is login to the control panel on your test domain, write content, make edits and do CMS things. This will change the flat files in your project. When your site is looking good locally push the changes up to GitHub and your site will automatically be deployed! That's what I'm doing for Epic Laravel and it's working great ;)
Conclusion
In this post we've gone from no website to a functional one with a CMS. The most complicated or technical part is probably setting up Laravel Valet for local development. Once the site is running we can do lots of edits from the Control Panel. We can also use our Laravel, PHP and Tailwind knowledge to build custom functionality or buy pre-built solutions from the Statamic marketplace. Moving forward I'm looking forward to exploring the Statamic core concepts to build the site and maybe even install Statamic into my existing Laravel projects.